Things You Have To Know About the Micrometer
Things You Have To Know About the Micrometer

A micrometer, also known as a micrometer screw gauge, is a device for accurate measurement of tungsten carbide buttons, tungsten carbide studs, cemented carbide cutters, cemented carbide rods, and tungsten carbide tips. Before packaging tungsten carbide buttons, workers must check their diameters and dimensions to meet their tolerances. It’s vital for everyone who works for or with tungsten carbide products to know these things about the micrometer.
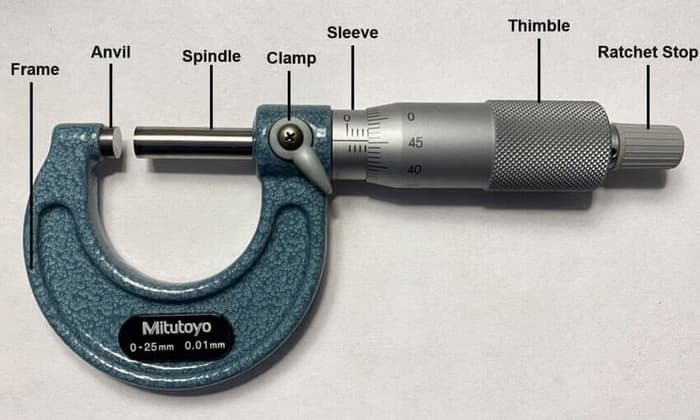
A micrometer consists of a frame, anvil, spindle, sleeve with vernier graduations, thimble, ratchet stop, and lock.
The frame of a micrometer is always a U-frame. While turning a small pin spanner on the rear of the ratchet knob, the anvil and spindle will get closer or further. Then the sleeve and thimble will show the number of what you are measuring.
Operating Instructions
1. Before using the micrometer to measure tungsten carbide productions, we should clean the micrometer and turn a small pin spanner to check whether its zero line is repositioned relative to the markings on the thimble. If not, the micrometer should be banned to use or should be adjusted.
2. Put the tungsten carbide buttons between the anvil and spindle, the turn the pin spanner to make them get closer until it clicks. The diameter and height of a tungsten carbide button need to examine.
3. Read the measurement. We should read the measurements on the sleeves and thimble, then estimate a thousandth based on the thimble.
4. After using the micrometer, we should wipe it clean and oil it, then put it in a box, and place it in a dry place.
Read the measurements
1. Read the Liner Graduation
The lines above the horizontal zero line tell the millimeters. There is 1mm between two lines.
The lines under the horizontal zero line tell the half-millimeters. If you can see the half-millimeter, it means the measurement is in the first half-millimeter. If not, in the second half-millimeter.
2. Read the Thimble Graduation
There are 50 graduations on the thimble. When the thimble turns a circle, the liner graduation will move to the left or right 0.5mm. That means every graduation on the thimble tells 0.01mm. Sometimes, we can estimate the thousandths.
At last, we should plus the liner graduation and thimble graduation together.
There is an example.
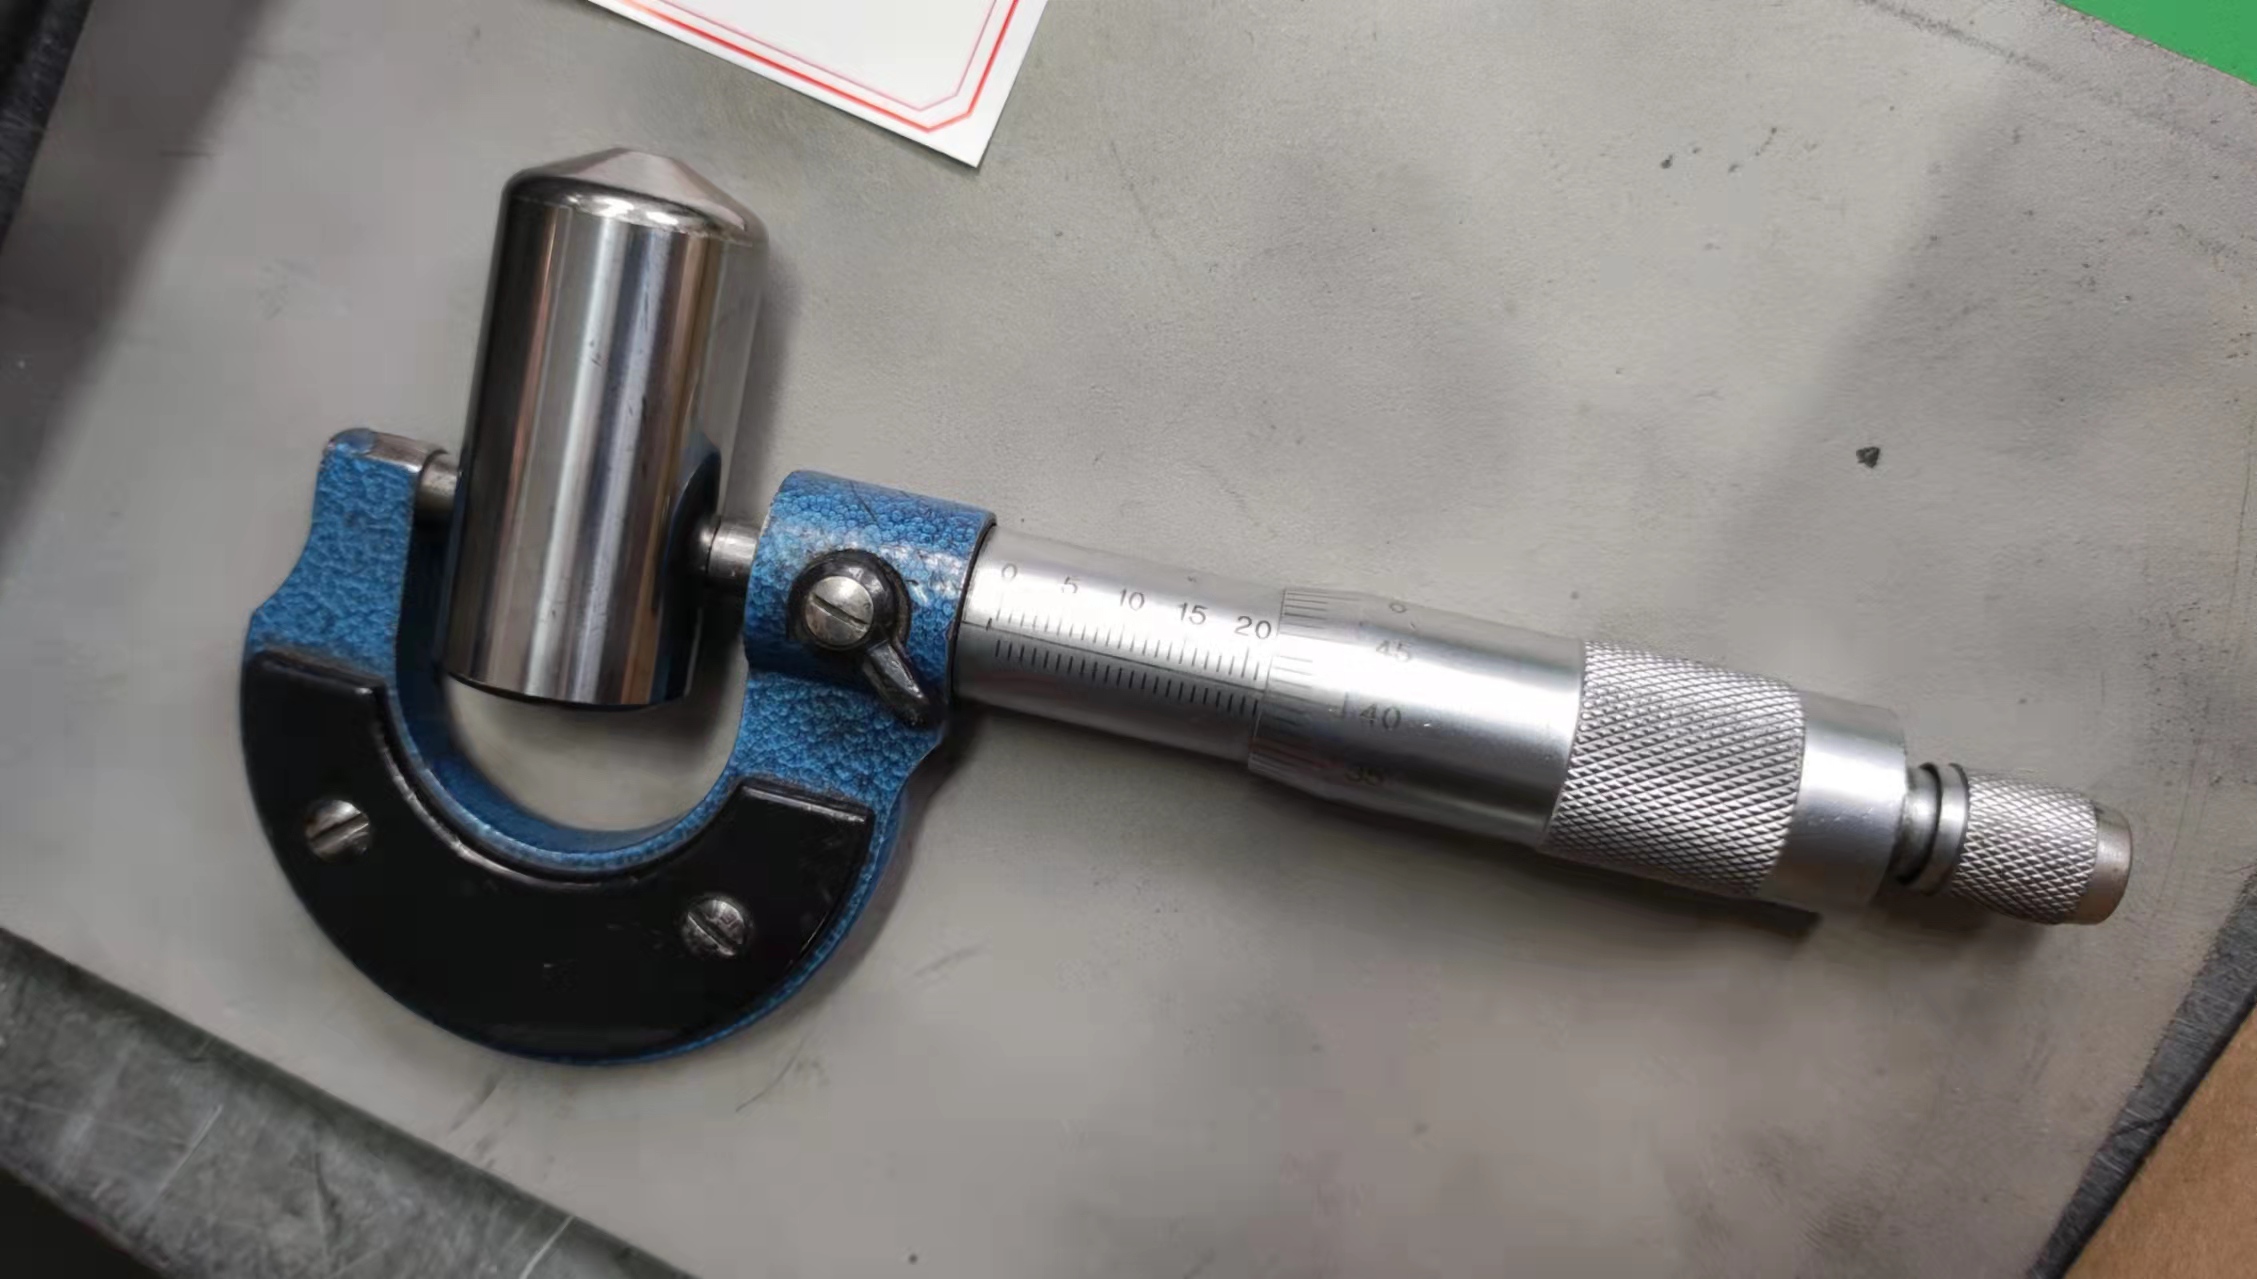
In this picture, the liner graduation is 21.5mm, and the thimble graduation is 40*0.01mm. So the diameter of this tungsten carbide product is 21.5+40*0.01=21.90mm
Precautions
1. Clean micrometer
Remember to clean the micrometer with a dry, lint-free cloth frequently, especially before using it.
2. Check zero line
It is critical to check the zero line before using the micrometer or after it has been damaged. If there is something wrong, the micrometer should be recalibrated.
3. Oil micrometer
After using the micrometer, we should oil it and this is pretty important before storing it for a long time.
4. Store micrometer carefully
The micrometer always has a protective storage case. Put it in a ventilated and low humid environment and at room temperature.
By protecting the micrometer and using it with care, we can correctly measure the diameter of tungsten carbide. If you want more details or information about this or tungsten carbide products, please visit our website: www.zzbetter.com


